
What’s an elegant, sophisticated dessert you can easily make for under $12?

If you guessed Baked Alaska, you’d be right.
Of course the photo and title might have given the answer away.
This really is the queen of desserts. All the other desserts have to sit on the curb and wave as she goes by. Baked Alaska has been around for a long, long time. It originated at the New York restaurant Delmonico’s in 1867, coinciding with the U.S. acquisition of Alaska from Russia.

A recipe first appeared in print in Fannie Farmer’s 1896 Boston Cooking-School Cook Book, although the idea of insulating ice cream and cake inside a layer of baked meringue and then baking it has been around a lot longer than that.
This qualifies as a classic, don’t you think?
If you’ve ever been on a cruise ship this will be familiar – Imagine you’re at dinner, and it’s dessert time. Suddenly the lights go down, the music comes up, and every waiter on the ship starts dancing around the room, trays of flaming desserts with sparklers for added oomph in one hand, twirling napkins over their heads with the other. It’s the traditional Baked Alaska Parade celebrating the last dinner of the cruise.

When you make this at home, you can decide if you want to do the whole parade . . . or not. It might be a little bit over the top, but that’s what being a Diva is all about, right? What we lack in cash we make up for in creativity. Personally, I’m going to skip the “flaming with sparklers” part.
As chic as its reputation may be, it’s just a simple ice cream bombe and a bit of cake covered by about 40¢ worth of meringue and either broiled in the oven or browned with a kitchen torch. You can use store brand ice cream and day old cake and no one will be any the wiser.
So, here’s how it’s done.
BAKED ALASKA
For the cake:
You’ll need a single layer of cake for the bottom. This can be sliced pound cake, or a single layer baked from a small mix like Jiffy brand, or even Brownie mix!
For the ice cream bombe:
A bombe is simply layers of ice cream in contrasting colors in a spherical mold, like a bowl. It’s easier to make if you have nesting bowls so you can make the first layer and press the smaller bowl into the ice cream to form a nice even layer. To save money, buy cartons with more than one flavor like chocolate and vanilla, vanilla with orange sherbet or Neapolitan.
You can use any combination of flavors you wish.
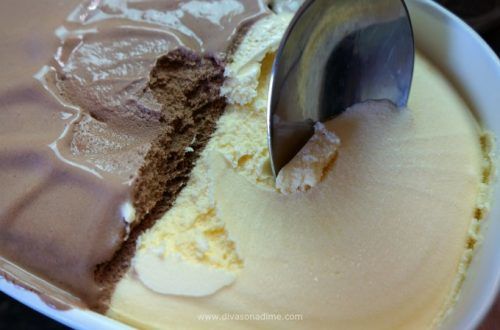
For this chocolate lover’s variety, I used a layer of dark chocolate brownie with Death by Chocolate, French Vanilla and Chocolate ice cream.
The quantity of ice cream you need will depend on the size of your bowl.
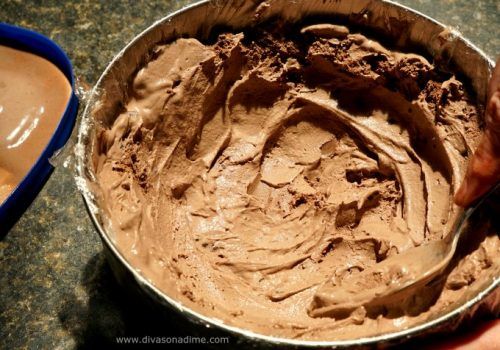
Spray the bowl with cooking spray and line with plastic wrap.
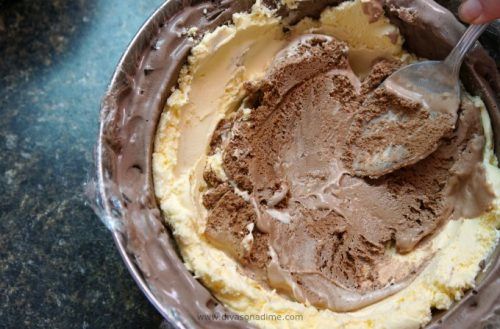
Add your first layer of ice cream and smooth with the back of the spoon.
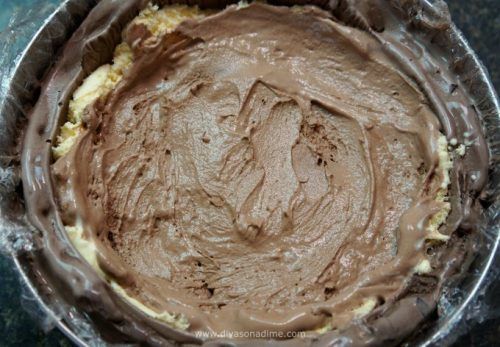
Place the smaller bowl in the ice cream and press down to make a perfect even layer. Freeze until solid.
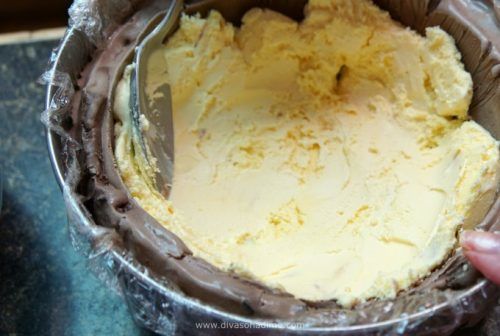
Remove the inner bowl and repeat with remaining ice cream layers.
Place your cake layer on the bottom and press it into the ice cream.
Step by step photos
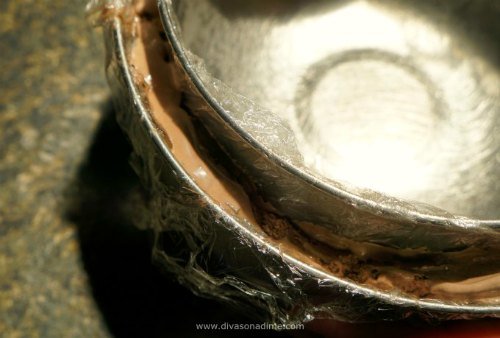
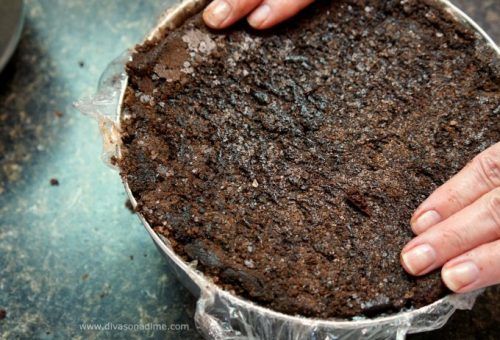
Wrap with plastic and freeze completely.
Diva Tip – Wait until you’ve made your meringue before unmolding the bombe.
To make meringue:
Very simply, a meringue is a mixture of stiffly beaten egg whites and sugar. Begin with a very clean metal bowl. Even the smallest amount of fat, grease or egg yolk will prevent your meringue from attaining volume.
To learn everything you’ve ever wanted to know about meringue and more go here – The Magic and Mayhem of Making Meringue
Italian Meringue
This is the best way to make a really stable meringue. Also preferred by those concerned about uncooked egg whites as the hot syrup cooks the egg.
What You’ll Need:
- ¾ cup sugar
- ¼ cup water
- 1 ½ tablespoons light corn syrup
- 4 large egg whites, room temperature
- ¼ cream of tartar
- Pinch of salt
Here’s How:
- In a small sauce pan, bring sugar, water, and corn syrup to a boil, stirring until sugar dissolves. Next cook, without stirring, until syrup registers 248° F on a candy thermometer.
- Meanwhile, whisk egg whites with a stand or hand mixer on low speed until foamy. Add cream of tartar and salt. Increase the speed to medium and whisk until soft peaks form, 6 to 8 minutes.
- Reduce speed to low, and pour your hot syrup down side of bowl in a slow, steady stream. Increase the speed to high, and whisk until mixture stops steaming, about 3 minutes. Use immediately.
To assemble the Baked Alaska:
Remove the ice cream bomb from the mold and invert onto a parchment lined baking sheet.
Remove the plastic wrap and working quickly, cover the ice cream completely with the meringue.
Use the back of a spoon to make swirls and peaks in the meringue.
Diva Tip – You can refreeze the bombe with the meringue of the ice cream starts to melt before you’ve browned it.
To Brown:
If using a handheld kitchen torch; hold torch 3 – 4 inches from meringue and brown the meringue to your liking.
Julia Child said – “Every woman ought to own a blow torch” Here’s an inexpensive one that I use and love – Sondiko Butane Torch, Crème Brulee Torch
If using your oven; preheat oven to 500°. Place the Baked Alaska in the oven until meringue is browned approximately 3 to 4 minutes.
Transfer to a serving plate or cake stand.
I’ve been asked about my square cake stand. Mine is an antique and I haven’t seen one like it other than in antiques stores. If you don’t have a cake stand this one here is a classic and a good price: Libbey Glass Cake Stand with Dome Lid
Serve immediately and bask in your “I am such a Diva” glory!
You may also like – How to Make the Perfect Summer Dessert – Mixed Berry Pavlova Orange Vanilla Bombe Two Ingredient Ice Cream
This culinary torch prioritizes safety and durability with a safety lock, broad base, and burn-free finger guard. It easily refills with any butane (not included) and features Piezo Ignition Technology for one-handed operation. Perfect for caramelizing sugar, searing meats, and lighting candles, it also has an adjustable flame reaching up to 1300 °C (2372 °F). Compatible with all butane tanks, simply use the included adapter for short nozzles. Enjoy effortless cooking with this versatile kitchen tool!
This elegant cake stand with a glass dome is perfect for showcasing your confectionary creations. The curved glass dome provides 360-degree views, adding a touch of sophistication to any table. Its multifunctional design pairs well with other serveware and is ideal for displaying a variety of desserts. Handwash for easy cleaning and long-lasting use. Whether used as a centerpiece or part of a larger spread, this versatile cake stand elevates any occasion.