
How to Make Homemade Roasted Red Peppers
Roasted red peppers are a culinary delight, adding sweet, smoky flavor to dishes and sandwiches alike. Forget the pricey jars at specialty stores—making roasted red peppers at home is easy, cost-effective, and yields superior results. Follow this simple recipe to elevate your meals with homemade roasted red peppers.
What You’ll Need:
Red bell peppers- the quantity is up to you
Here’s How:
Preheat oven to 400°F.
Wash the red bell peppers thoroughly. Cut the tops and bottoms off and cut a slice down one side. Remove the stems and seeds. (save some seeds of you want to grow some pepper plants!) Open the pepper and flatten into a big slab of pepper. Place the pepper halves and ends, cut side down on a baking sheet lined with aluminum foil or parchment for easy cleanup. Rub both sides the peppers lightly with olive oil. Just put some oil in your hands and schmere each piece of pepper.
Once the oven has preheated turn the oven off (we just need a nice hot oven to start this cooking fast) And now preheat your broiler on high. Place the baking sheet with peppers in the oven, about 4-6 inches from the broiler heat source.
Broil for 10-15 minutes, (don’t go far, you need to be watching nearly continuously) or until the pepper skins are quite charred and blistered. This process gives the peppers a lovely caramelized flavor, with a hint of smoke and helps loosen the skin for easy removal.
Remove the baking sheet from the broiler and let the peppers cool for a few minutes until they are cool enough to handle. Peel off the charred skin from each pepper half. It should easily slide off, revealing the tender roasted flesh beneath.
Once peeled, you can slice the peppers into strips r whatever you like and use immediately.
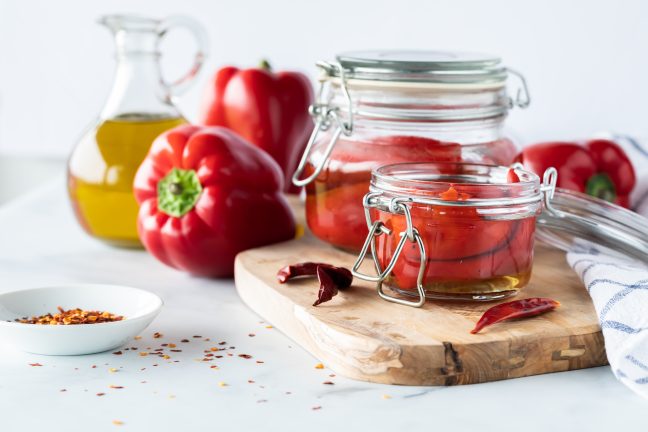
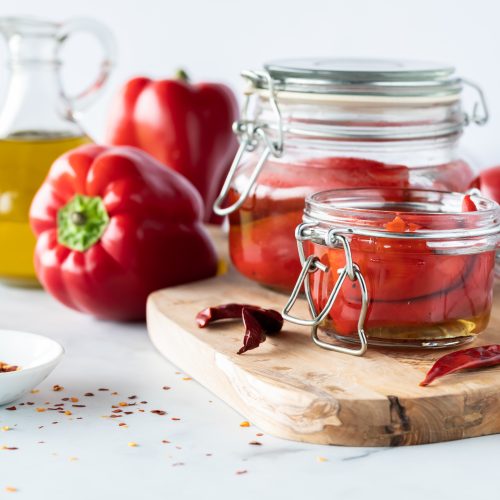
To store, place the strips in a clean, air-tight container and cover them with olive oil. Store the roasted red peppers in the refrigerator for up to two weeks.
What do I do with them not that I’ve got ’em?
-
-
Salads: Add sliced roasted red peppers to Mediterranean salads for a burst of flavor and color.
-
Sandwiches: Layer roasted red peppers on sandwiches, wraps, or paninis for a smoky sweetness.
-
Pasta: Toss roasted red peppers into pasta dishes like creamy Alfredo or light marinara for added depth.
-
Pizza: Top homemade pizzas with roasted red peppers along with your favorite toppings for a gourmet touch.
-
Appetizers: Serve roasted red peppers as part of an antipasto platter with cheeses, olives, and crusty bread.
-
Dips and Spreads: Blend roasted red peppers into hummus or creamy dips for a vibrant twist.
-
Homemade roasted red peppers are versatile! Enjoy the rich, smoky taste of freshly roasted peppers in your favorite recipes—it’s a simple kitchen technique that elevates any dish.
Homemade Roasted Red Peppers
Ingredients
- 4 red bell peppers or any color really
- 1 tablespoon olive oil
Instructions
- Preheat your oven to 400°F. When it's heated turn the oven off and switch to the broiler on high.
- Wash the red bell peppers thoroughly. Cut the tops and bottoms off and slice the pepper on one side to remove the stems and seeds. Open the pepper into a big slab.
- Place the pepper slabs, tops and bottoms cut side down on a baking sheet lined with aluminum foil or parchment for easy cleanup.
- Schmear the peppers lightly with olive oil.
- Place the baking sheet with peppers under the broiler, about 4-6 inches from the heat source.
- Bake/broil for 10-15 minutes or until the pepper skins are quite charred and blistered. This process helps loosen the skin for easy removal.
- Remove the baking sheet from the broiler and let the peppers cool for a few minutes until they are cool enough to handle.
- Peel off the charred skin from each pepper half. It should easily slide off, revealing the tender roasted flesh beneath.
- Once peeled, you can slice the peppers lengthwise into strips and use immediately.
